It can be installed on various platforms as per anyone's convenience, and I am going to discuss some of them here -
- Complete install on a laptop
- Dual-boot with Windows/Linux
- Install on VirtualBox
- Install on a USB
Each of the above process are DIY, out of which 'complete install on laptop' is the best, but for the rest of the processes, some people may experience troubles while making partitions for Dual-boot or running VirtualBox. On the other hand, Installing Android-x86 on a USB is a lot better option as this doesn't interfere with your Laptop's hard disk or overwrite system's MBR/Grub, instead is very portable and lets one plugin Android on any Laptop/Desktop anywhere as per one's convenience.
Hence, in this article, I will discuss on how to install Android-x86 on any USB -
Requirements -
Android-x86 4.4 Release ISO
One >2GB Bootable USB drive
Linux Live USB Creator
EaseUS Partition Master
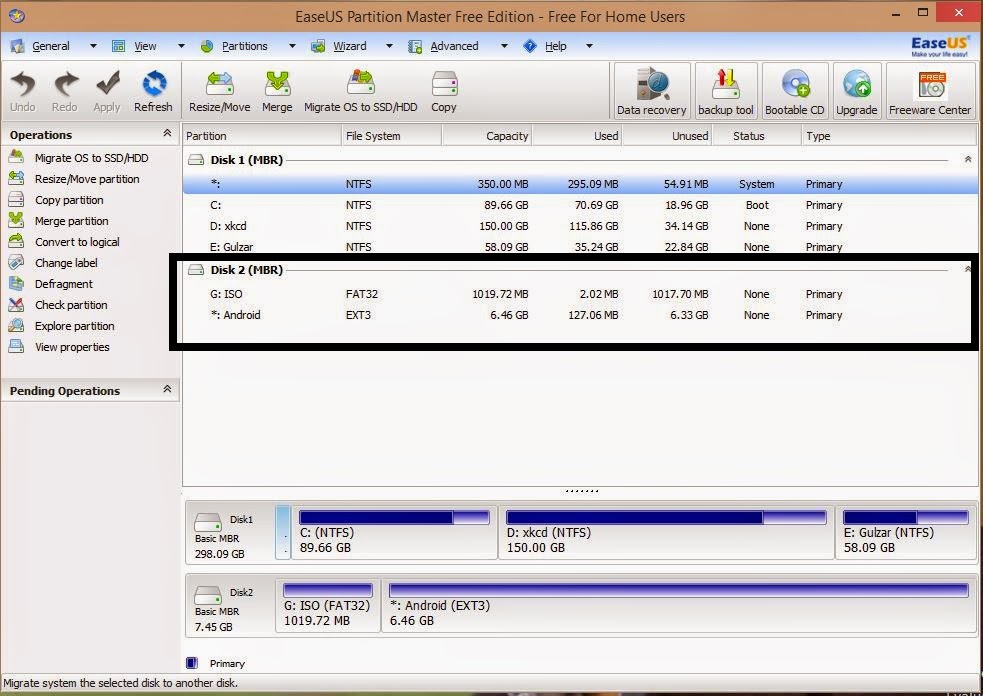
Make Partition on USB drive
Download the EaseUS Partition Master from the site and make two partitions on the USB. First partition should be formatted as FAT32 and be of size greater than 750mb (I made it 1 GB) and the second partition should be formatted as ext3 and be of the remaining size of USB.
Make USB bootable for Android-x86
Run Linux Live USB Creator and select the target USB. Then select the target ISO from the folder where it was downloaded. Now, cick on the 'Bolt' sign and wait for 2-3 minutes to let the process finish. It will automatically install the ISO on the partition #1 which is in FAT32 format as Windows doesn't recognize ext3 format.

Reboot the System
Now, reboot the system and go into Boot order menu of the BIOS (by pressing F9 for HP, F12 for Dell). Change the Boot order to boot from USB. Now, save and exit the settings.


After recognizing the USB, a blue Android-x86 screen with 4 options will appear. Select the 4th option - Install Android-x86 on Hard disk.
.JPG)
Now, installer will ask for the partition on which to install Android-x86.
[BE VERY CAREFUL]
Now, you have to select the partition which you had formatted as ext3 aka Linux partition.
DON'T select any other partition or your system's Hard-disk.

Now, when prompted, format the selected partition to ext3.
.JPG)
.JPG)
Then it will ask if you want to install the Grub, click Yes.
.JPG)
Then it will ask if it can write the OS to the disk, click Yes.
.JPG)
Then, when prompted, reboot the system and voila! Android-x86 has been installed on the 2nd partition of your USB.

Now, you can use Android on any laptop anytime with your data/apps intact.
If you have any questions or inputs, leave a comment below and I will get back to you.
PS - Now, you can now format the 1st partition of the USB as FAT32 again and use it as a storage space yet again.
Note: Install at your own risk. Works for me though and I followed the exact same steps I listed above
thank you for your great explanation.. this was very helpful
ReplyDelete